| VELOUR REPAIR INSTRUCTIONS
Materials: razor blade, (TC) triclean prep cleaner, velour fibers, (63) or (64) velour base adhesive, (53 or 57) velour spray adhesive, foam, dacron, (HAP) sub-patch material, preval sprayer, mouth atomizer or Wagner airless spray gun, an electrostatic flock applicator, or (A111) velour atomizer, curved needles and thread.
First step: CLEANING
The cleaning of the velour fabric is a vital & essential part of the repair process. This improves the finished repair and also ensures durability. Clean the area around the repair with (TC) Triclean Prep Cleaner. Allow to dry. If the damage to the fabric is a burn, the area around the hole has likely been burned as well. Remove any remaining burned fabric with knife, razor blade or small curved scissors.
Second step: COLOR
Match the color as precisely as possible. Velour consists of small mixable fibers. Although the mixture will not turn out as pure as a paint mixture, a visibly identical match is possible. It is important to start with color combinations as close as possible to the original color.
Third step: SUB-PATCH
If the hole penetrates the fabric through to the foam, use a sub-patch. There are three different techniques for this:
1) Sub-patch Material. Cut a small patch of (HAP) Sub-patch Material or use a piece of (FM) fine mesh, (applying masking tape to one side for reinforcement and to keep the adhesive from adhering to the foam) slightly greater (min.1/4") than the diameter or length of the hole. Insert it between the foam and the fabric with a palette knife or tweezers.
Replace any missing foam to level out the repair area. Adhere the sub-patch with (63) or (64) Velour Base Adhesive. Dry completely with a conventional hair dryer or low-temperature heat gun, then check the sub-patch adhesion.
For a cut, pull the sides together, then secure with masking tape till dry.
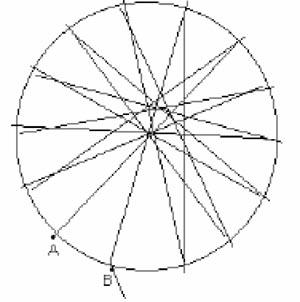
2) Cross-stitch for small, round holes. For this, you will need thread and a curved needle. First of all, thread the needle and tie a knot at the end of the thread. Insert the needle into the hole and pierce the fabric underneath coming upwards to a point near the edge of the repair. Then, before continuing to pierce the fabric from underneath upwards, cross the fabric to the other side of the hole. Follow this process, pulling the thread taut from time to time, taking care to adjust the tautness in order to prevent wrinkles in the fabric. When you’ve reached point B, make one more crossing, and then tie the thread. Secure the stitch by applying Velour Base Adhesive. This is a liquid adhesive, so it will penetrate between the thread and be absorbed by the fabric, becoming part of the original stitch.
.
.
.
.
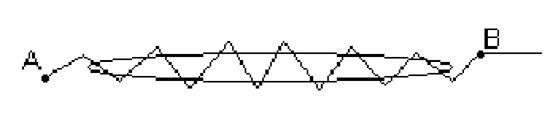
3) Zigzag cross-stitch for tears. Use thread and a curved needle. Thread the needle and tie a knot at the end of the thread. Insert the needle into the hole and pierce the fabric from underneath coming upwards at a point a bit fur further her from the edge of the hole (point A). Then proceed with a zigzag motion until reaching point B. Pull the thread taut to avoid wrinkles. Tie the thread, hiding the knot. Secure the stitch using Velour Base Adhesive. Being a liquid adhesive, it will penetrate between the thread and will be absorbed by the fabric, becoming part of the original stitch.
Fourth step: FILLING TO SURFACE LEVEL
This is one of the most important steps leading to a finished quality repair. The objective is to fill the hole to surface level of the damaged area, using "Velour Base Adhesive" and velour fibers.
Apply Velour Base Adhesive to a level just below surface (a small amount of fiber can be mixed with the adhesive for color). This will insure that the fibers will not form a mound extending higher than the surface of the seat. Repair should be as level as possible.
However, to guarantee that the repair will not decrease in size when the adhesive completely dries hours later, begin the process by using a drop of "Velour Base Adhesive" and a small piece of single ply paper towel (cut its size to the shape of the hole). The paper towel brings up the level of the repair.
Apply the Velour Base Adhesive, one drop at a time with a piece of paper towel to the interior of the hole, working to the top of the hole. 4-6 layers may be needed. Apply the adhesive with a palette knife, always following the shape and direction of the original fabric. (This keeps the adhesive from being visible after drying).
Repeat the process if necessary to reach the surface level.
Important: At this point the hole should look completely filled and level. The less visible the hole, the better the final result.
Fifth step: BORDERS & COLORED AREAS
For those fabrics that have multiple colors, or a small border, use colored pencils or colored markers.
NOTE: Use water to wet the tip of the colored pencils before using.
Sixth step: VELOUR FLOCKING
Use masking paper or cut a hole in a piece of paper to protect any area that you do not wish to cover with Velour Spray Adhesive. Spray a moist layer of (53) or (57) velour adhesive spray (1-5% (SL-7) crosslinker can be added, but not needed, for added durability). Use a (465P) preval, (8210) crown spray tool, (432L) mouth atomizer, or Wagner airless spray gun to spray adhesive.
Apply velour fiber with the (A111) Velour Atomizer, (PROLOUR) Electrostatic Velour Applicator or (CP-PLUS) Electrostatic Velour Applicator.
Place fibers (up to 80%) in electrostatic velour applicator, attach ground clip to springs under seat or place a paper clip in the clip and ground to the adhesive. Hold applicator 4" from surface, press button and shake.
This will blend the area to conceal your repair. If using “Electrostatic Velour Applicator,” charge the fibers to stand up when applied into the adhesive, leaving a soft, velvety feel to the repair. Dry thoroughly. A gentle hot air blower can speed the drying time. Place (TM9) teflon mat over area to protect fibers while drying.
Seventh step: SEALING & IMPROVING LOOK
Verify that the drying process is complete and then apply a soft layer of (STS) Soft Topcoat Spray over the repair to protect, seal and leave a soft, natural feel.
NOTE: Using a hair dryer during the repair process will increase the durability of the repair.
SEWING:
BLIND STITCH INSTRUCTIONS:
This technique is used to repair damage on original seams or where a seam can be used to hide the damage. This makes a new a seam without the need to disassemble the fabric. This technique works with one or two curved needles. The difference is based on which sewing process will hide the existing damage the best.

First Step: MARK TRAJECTORY
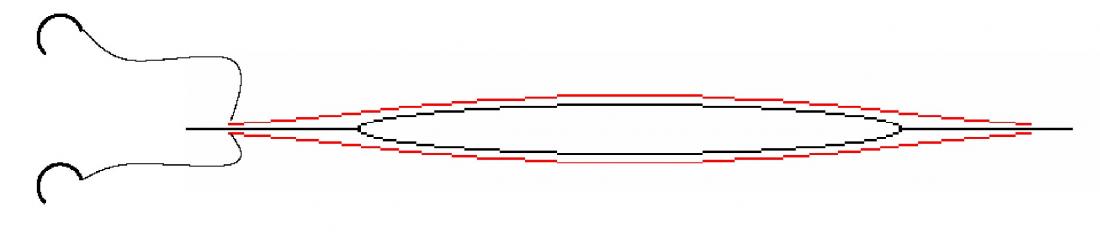
First locate where the damage begins and finishes (the black lines). Mark with a colored pencil ( the red lines) a trajectory that surrounds the damage, beginning and finishing in a point before and after the damaged area. Make sure the distance is the same on both sides of the seam.
Second Step: STARTING POINT
SINGLE NEEDLE: Thread the needle and make a knot in the end of the thread. Insert the needle through damage and perforate the fabric from down upwards in an end of the drawn layout.
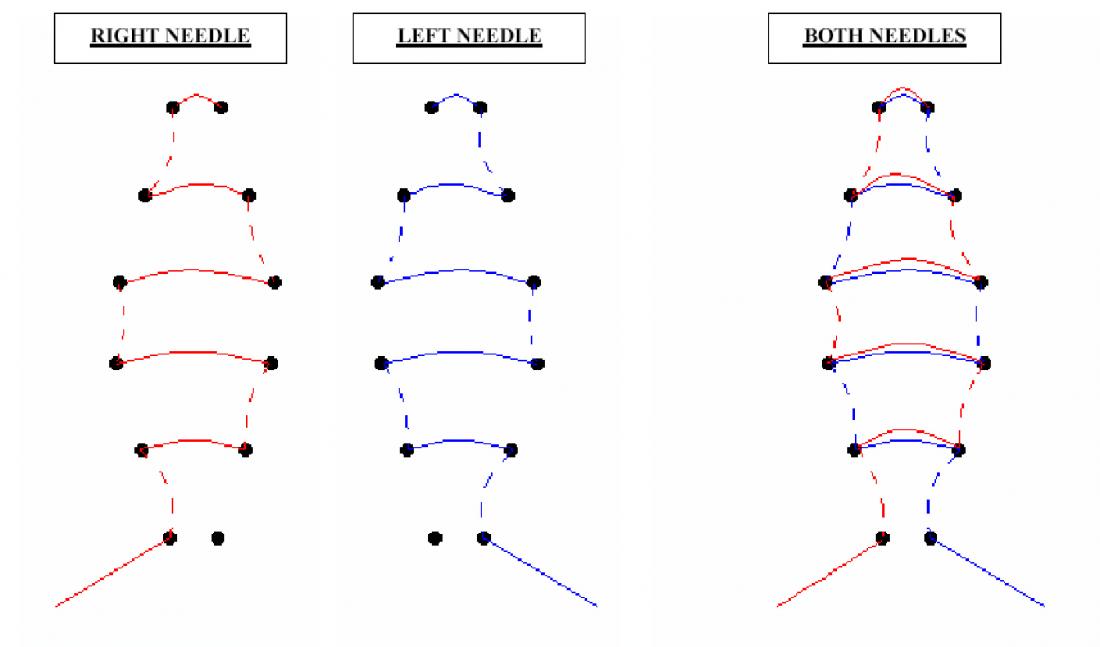
DOUBLE NEEDLE: Thread the needles and make a knot in the end of threads. Insert the first needle through the damage and perforate the fabric underneath upwards starting at one end as in the layout. Next insert the second needle through the damage and perforate the fabric from underneath upwards just to the other side of the seam in the same end of the layout. Afterwards you should have the thread from both needles next to each other simply separated by the original seam.
Third Step: SEWING
SINGE NEEDLE: Follow movement of zigzags until arriving at the other end of the layout. Always try to make the distance between needle points, and from the damaged area, the same on both sides.
DOUBLE NEEDLE: Although this seem seems to be a complex explanation, without a doubt it is the easiest system to remember and perfect. First, try to find out what was the distance between the original seam and use that as a guideline. Simply use the needles to weave back and forth near the damaged area to create a new seam. Make sure to start far enough away from the original seam to create a strong stitch.
Let us suppose that in this case it is ¼".
The procedure is simple, take the needle your left, insert it by the hole where it passes the thread of the needle on the right, and make the perforation point ¼" ahead always following the layout drawn. To continue do the same with the other needle. The two needles are in the side opposite of where they were, and ¼" more advanced. We already have the first perforation point. Now repeat this process, always following the layout drawn, and tightening the threads after each 4-5 perforation points.
DIAGRAMS NEEDLES MOVEMENT
Fourth Step: KNOT
SYSTEM TWO NEEDLES: When reaching the end of the drawn layout, the 2 threads are next to the other, as when started, (separated by the original seam). Make a double knot, one with the other, as if tying your shoes. Now continue to insert the needles downwards, making them move away from the weave of the seam to hide the knot under the seam. Pull the threads a bit, cut them as close as possible from the surface, the thread will hide by itself from a recoiling movement.
SPORT CLOTH SEAT REPAIR
1) COLOR
Match the color as precisely as possible using the shorter Sport Cloth fibers. Velour consists of small mixable fibers. Although the mixture will not turn out as pure as a paint mixture, a visibly identical match is possible. It is important to start with color combinations as close as possible to the original color.
2) FILLING TO SURFACE LEVEL
This is one of the most important steps leading to a finished quality repair. The objective is to fill the hole to surface level of the damaged area, using "Velour Base Adhesive" and shorter velour fibers.
Apply Velour Base Adhesive to a level just below surface (a small amount of fiber can be mixed with the adhesive for color). This will insure that the fibers will not form a mound extending higher than the surface of the seat. Repair should be as level as possible.
3) VELOUR FLOCKING
Use masking paper or cut a hole in a piece of paper to protect any area that you do not wish to cover with Velour Spray Adhesive. Spray a moist layer of (53) or (57) velour adhesive spray (1-5% (SL-7) crosslinker can be added, but not needed, for added durability). Use a (465P) preval, (8210) crown spray tool, (432L) mouth atomizer, or Wagner airless spray gun to spray adhesive.
Apply velour fiber with the (A111) Velour Atomizer, (PROLOUR) Electrostatic Velour Applicator or (CP-PLUS) Electrostatic Velour Applicator.
Place fibers (up to 80%) in electrostatic velour applicator, attach ground clip to springs under seat or place a paper clip in the clip and ground to the adhesive. Hold applicator 4" from surface, press button and shake.
This will blend the area to conceal your repair. If using “Electrostatic Velour Applicator,” charge the fibers to stand up when applied into the adhesive, leaving a soft, velvety feel to the repair. Dry thoroughly. A gentle hot air blower can speed the drying time.
Place (TM9) teflon mat over area to protect fibers. Use a wallpaper roller to lightly roll over the repair so the fibers lay down. Dry thoroughly. A gentle hot air blower can speed the drying time.
TIP: After drying, lightly iron the repair with a clothes iron to further help the appearance.
4) SEALING & IMPROVING LOOK
Verify that the drying process is complete and then apply a soft layer of (STS) Soft Topcoat Spray over the repair to protect, seal and leave a soft, natural feel.
NOTE: Using a hair dryer during the repair process will increase the durability of the repair.
|

